Amazon Web Services, or AWS, is a set of web services provided by Amazon.com. If you're looking for web hosting through AWS and have only had experience with managed hosting services before, there's a lot to learn. In this tutorial, I'm going to highlight some of the most important features and services of AWS.
AWS is a veritable alphabet soup of acronyms, so I highly suggest you give AWS in Plain English a read through before attempting to tackle the beast.
The way I go about setting up a server is far from the only way to do it, but it will be a complete guide. The AWS Documentation is absolutely massive, so you should be able to find any additional information there.
Prerequisites
- Basic command line knowledge - if you've never used the command line before, trying to set up AWS will be a bit terrifying. I would recommend reading through the first few chapters of The Command Line Crash Course and getting comfortable before moving on to AWS.
- Ability to set up a website - you should already know HTML and CSS, and have set up a live website at some point.
Goals
- Make an AWS account and learn about the key services
- Configure AWS Security
- Set up and configure virtual server
- Set up a LAMP stack (Linux, Apache, MySQL, PHP)
- Set up virtual hosts
Where Things are Located In Linux
This will come in handy as you read the article.
- Public HTML -
/var/www/html - Apache Configuration -
/etc/httpd/conf/httpd.conf - Hosts -
/etc/hosts - phpMyAdmin Configuration -
etc/httpd/conf.d/phpMyAdmin.conf - SSH Configuration -
/etc/ssh/sshd_config
Making an AWS Account
Here's the good news - AWS is free for a year, so you can run through this or any tutorial to get an idea of how it all works, regardless of whether or not you want to use it.
Go to Amazon Web Services and sign up for an account. If you already have an Amazon.com account for something else (Kindle, buying stuff online) it will be the same account. You'll choose the Basic (free) account, be prompted for your credit card and phone number, they'll call you to confirm, and you're in.
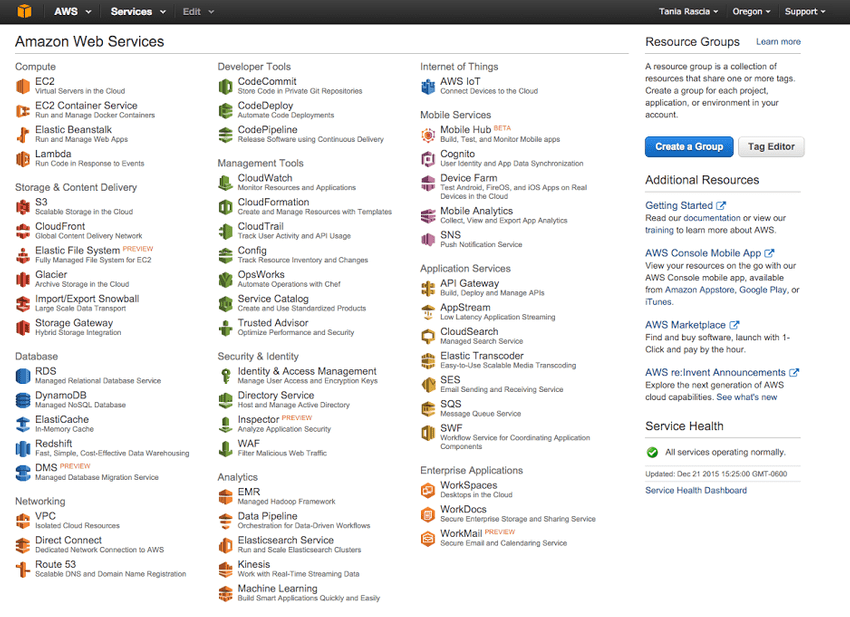
No opening preamble - here's the dashboard.
Key AWS Services
There are currently 53 services, with more being added all the time, but you most likely won't even use close to half of them. I'll take a moment to highlight the absolute most essentials.
An EC2 instance (Elastic Compute Cloud) is a virtual server in the cloud. You have complete control over the server, what gets installed on it, the configuration, and so on. Since we're setting up LAMP, Apache, MySQL and PHP are going to be installed on a Linux EC2 instance.
Amazon S3 (Simple Storage Service) is a static file storage service. It's like a simple web interface for FTP, in which you can host static files and also host static websites - so images, HTML, CSS, JavaScript, PDFs, mp3s, and so on, but nothing that requires a server. S3 containers are known as buckets.
IAM (Identity & Access Management) will contain all the settings and security configuration your for your account.
There are many, many useful services here, but we should be able to get started with just these three.
Securing Your Account
A good idea when first creating your account is adding some additional layers of security. Go to IAM on the dashboard.
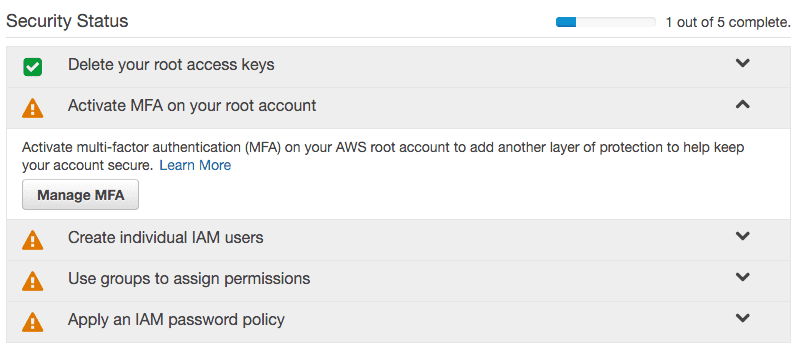
Activate MFA (Multi Factor Identification) on Your Root Account
Download Google Authenticator on your phone, and click Manage MFA. Select Virtual MFA Device. You'll scan a QR code with the Google Authenticator app. Type the random numbers that pop up into the input, and your device will be associated with the account. Now no one can log in to your root account without also having your phone.
Create Individual IAM Users
Go to Users and Create User. Make a username for yourself. User Security Credentials will also be generated when you create the user, so save or download the Access Key ID and Secret Access Key they give you. At some point, these will come in handy, so it's a good idea to make them right off the bat. Create a password for your user under Security Credentials.
Reason for users, according to AWS:
Create IAM users and give them only the permissions they need. Do not use your AWS root account for day-to-day interaction with AWS, because the root account provides unrestricted access to your AWS resources.
Create Groups
At this point, I'm going to go to Groups, create a group called Developer, and grant AdministratorAccess. Obviously, if you had a bigger team, you could allow access only to certain services, but since it's just me, I'm going to give it full access.
Create a Password Policy
In Account Settings, you can set a password policy (or leave it as is), and your security setup is complete.
Create an Account Alias
Finally, how do we log in with the user we just created? You'll notice at the top of the IAM dashboard, there's a horrible link:
IAM users sign-in link: https://stuff.signin.aws.amazon.com/console
Change it to something you'll remember. Log out of your account, and go to https://your-alias.signin.aws.amazon.com/console. From here, you'll log in with the credentials of the user you created before - you should no longer log in as root user.
Hopefully you feel pretty secure at this point, so we can finally move on.
Setting up an EC2 Instance
We're going to set up a Linux EC2 instance. The default settings for a Linux server do not allow access via password - they use Key Pairs. If you want to change that later you can (although it's not recommended), but it's necessary to generate a key pair to begin.
Generate Key Pair
Go to EC2, and click on Key Pairs. Generate a key pair, and call it whatever you want. Your_Key.pem will get saved to your downloads folder. Move the pem file from your Downloads folder to your .ssh directory, located in your main user directory. The whole URL to your pem file should be:
~/.ssh/Your_Key.pemYou can technically move this file anywhere, it doesn't need to be located in the .ssh directory to function.
Create a VPC
An instance requires a VPC (Virtual Private Cloud). Your region might contain a default VPC - mine did. You can check this by going to the EC2 dashboard and checking the settings on the right side for Default VPC. If it doesn't exist, set one up.
Create Security Group
In the EC2 dashboard, click on Security Groups. You will see one already created by default, but we'll make a new one to get accustomed to it.
Set a name (such as usernameSGregion) and apply it to the default VPC (should be the only one).
On Inboard, add rule:
- Type: HTTP
- Source: Anywhere (0.0.0.0/0)
- Type: HTTPS
- Source: Anywhere (0.0.0.0/0)
- Type: SSH
- Source: My IP
You can select the My IP option, or type "whats my ip" in Google to get your IP and type it in. These rules are telling the EC2 instance to allow inbound access to the internet (0.0.0.0/0) but only allow SSH access from your IP. You can technically set SSH access to the internet as well, just know that it's a reduction in security.
Launching an EC2 Instance
The setup for creating an EC2 instance is complete, so now we can launch. Go to Instances. It will tell you there are no instances set up, so click Launch Instance.
This will launch a quick start guide.
Choose an AMI
An AMI (Automated Machine Image) is a template for an instance. Later you can save your completed instance and launch new ones based on your configuration with an AMI. For now, we're going to use the first option on the list, which is an Amazon Linux AMI.
Choose Instance Type
Different instance types will provide different specs for CPU, memory, performance, and so on. The free-tier instance type is t2.micro, so select that and click Next - Configure Instance Details.
Configure Instance Details
Number of Instances: 1 Network: Default VPC Auto-assign Public IP: Disable (we'll set an elastic IP in a second) IAM Role: Create New IAM Role - you don't need to do this, but you can't set a role after you create an instance, so I'm going to create a role and give it AmazonEC2FullAccess. Shutdown Behavior: Stop
You can protect against accidental termination if you'd like.
You can skip past Add Storage and Tag Instance for now.
Configure Security Group
Select the security group you created before, with full HTTP and HTTPS access, and SSH access only from your IP.
Review and Launch then Launch. You will be prompted to enter a key pair, which will be the one you created earlier. Accept the terms and launch.
Connecting to an EC2 Instance
Back in the EC2 dashboard, if you go to Instances you'll see the new instance set up with all your specs. It takes a few minutes to initialize.
You can right-click on the empty space under Name and set a name to your instance. This is how it will look when it's ready.
Create an Elastic IP
Earlier I didn't create a public IP for the instance. Now I'm going to go to Elastic IPs. Click Allocate New Address. Under Actions, select Associate Address and apply it to the instance you just created.
An Elastic IP will remain yours even if you shut down the instance, while a regular public IP won't.
Now we can SSH into our instance and start installing services. Open Terminal. Find your "Public DNS" in your instance description. It will look something like ec2-00-00-00-00.us-region-0.compute.amazonaws.com.
The default user for AWS Linux is ec2-user. At this point, many people attempt to SSH to the server with the following:
ssh ec2-user@PublicDNSThe authenticity of host "xxx" can't be established. ECDSA key fingerprint is "xxx". Are you sure you want to continue connecting? (yes/no)
At this point, you will enter:
yesWarning: Permanently added "xxx" to list of known hosts. Permission denied (publickey).
As I mentioned before, the default settings for Linux require a public and private key match to log in, not password authentication. Now type the following:
chmod 400 ~/.ssh/Your_key.pemPermissions need to be set to 400 before you can use the key.
ssh -i ~/.ssh/Your_Key.pem ec2-user@PublicDNSAnd you're in!
       __|  __|_  )
       _|  (     /   Amazon Linux AMI
      ___|\___|___|

https://aws.amazon.com/amazon-linux-ami/2015.09-release-notes/
First thing you can do is update the packages.
sudo yum update -yYou will install all the security packages that have come out for AWS since the AMI was launched. Now your instance is secure and up to date.
If you've never used Linux, yum is Yellowdog Updater, Modified, and it's the primary package manager for Linux. You can easily install many services through yum.
With one command, you can install Apache, MySQL, and PHP.
sudo yum install -y httpd24 php56 mysql55-server php56-mysqlndYou can also install them one at a time - yum install httpd24 installs Apache 2.4, yum install php56 install PHP 5.6, etc.
If you simply ran yum install php, you would end up installing PHP 5.3, the default version of PHP, which came out in 2009. I'd prefer the instance to be more up to date, so I'm using the AWS LAMP stack recommendations.
Now start Apache.
sudo service httpd startAnd make sure it starts on each boot.
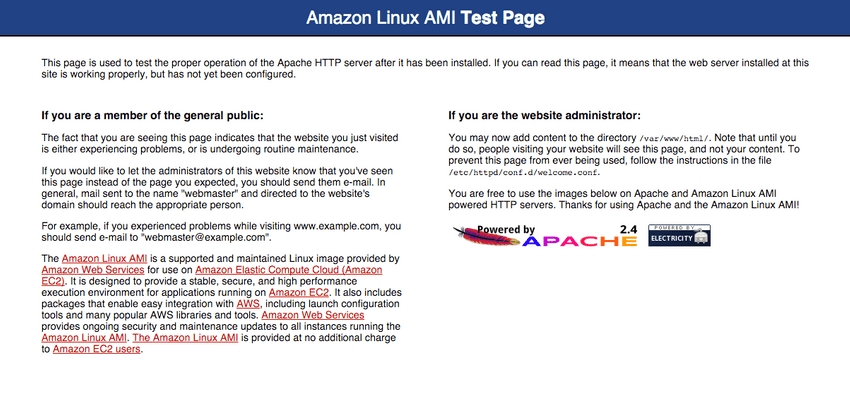
sudo chkconfig httpd onPaste the URL of the Public DNS into your browser, and you'll get this:
I'm also going to install git because it will come in handy.
sudo yum install gitStart MySQL. Later, you might decide to use RDS (Relational Database Service) for your database needs, but for now we can install MySQL on the server.
sudo service mysqld startNow we'll configure MySQL safely according to the AWS specifications.
sudo mysql_secure_installationIt will prompt you for the root password, which is blank, so press enter. You'll type y about 5 times until the configuration is complete.
Prompt MySQL to load on boot.
sudo chkconfig mysqld onInstall phpMyAdmin.
sudo yum-config-manager --enable epel
    sudo yum install -y phpMyAdmin
Edit the phpMyAdmin configuration file.
Find this:
<Directory /usr/share/phpMyAdmin/>
  <IfModule !mod_authz_core.c>
    # Apache 2.2
    Order Deny,Allow
    Allow from All
    Allow from 127.0.0.1
    Allow from ::1
  </IfModule>
</Directory>
If you want to be able to access phpMyAdmin from any IP, change it to this:
Order Allow,Deny
Allow from All
The preferred security method would be to add your IP to the bottom of the list and leave the other settings as is.
Allow from YOUR_IPAlso modify this configuration.
<RequireAny>
  #Require ip 127.0.0.1
  #Require ip ::1
  Require all granted
</RequireAny>
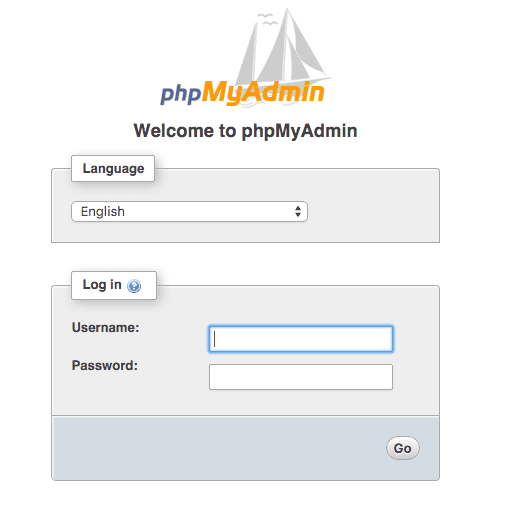
phpMyAdmin should work now when you go to http://PublicDNS/phpmyadmin.
You can login with root and the password you set earlier.
Create a new user
Let's create a new user so we're not using the default ec2-user. Log in as sudo (root) user.
sudo suCreate user. I'll call it your-user.
useradd your-userSet a password for the new user.
passwd your-userEnter the password twice.
Now, if I'm using SFTP as well as SSH, I'll want to be able to access the Public HTML folder (/var/www/html) with my user. You can't sudo in SFTP, so we'll need to assign a group to the www directory as well as the new user.
Modify New User Permissions
Create a www group.
groupadd wwwAdd group to new user.
usermod -a -G www your-userRun the following commands.
chown -R root:www /var/www

chmod 2775 /var/www

find /var/www -type d -exec sudo chmod 2775 {} +

find /var/www -type f -exec sudo chmod 0664 {} +
Now user your-user will be able to write in the www directory.
Give New User SSH Access
Open a new local Terminal window. Run this command to get the public key from your pem file.
ssh-keygen -yWhen it prompts you for the URL, ~/ssh/Your_Key.pem won't work. Instead, write out the full path.
/Users/you/.ssh/Your_Key.pemNow the public key should come up. It will start with ssh-rsa and include a long string. Save it.
Back in your AWS Instance Terminal, change users to the new one you created.
sudo su - your-userYou'll be in the /home/your-user directory. Make a directory for your public key to live and set the proper permissions.
mkdir .ssh
chmod 700 .ssh
Create authorized_keys and give it the proper permissions.
touch .ssh/authorized_keys
chmod 600 .ssh/authorized_keys
Add the public key to the authorized_keys configuration.
nano .ssh/authorized_keysPaste the keys, CTRL + O, Enter, CTRL + X` to save and exit.
Now your-user has permissions to SSH into your instance!
Give User Sudo Access
An easy way to give your new user sudo access is to run this command as root:
sudo usermod -aG wheel your-uservisudoPress i on the keyboard to enter Insert Mode. Find # %wheel ALL=(ALL) ALL and uncomment it (remove the #). Save and exit by pressing exit, and typing :wq! plus enter.
SFTP into Instance
If you want to SFTP into the instance, you can use the same Server (Public DNS) and username (your-user), and select key instead of password, linking to Your_Key.pem.
So you want SSH and SFTP access without using a keypair?
It's possible to enter SSH and SFTP with a password instead of a keyfile. This way you can access the server on any computer without special credentials. Obviously, this is usually advised against, but here's how to do it.
Back in the Security Groups, ensure that SSH has access from (0.0.0.0/0), and not just your IP.
Edit the SSH configuration file with nano /etc/ssh/sshd_config. Find #PasswordAuthentication yes and uncomment. There might be another PasswordAuthentication below it, make sure it's set to yes.
Restart SSH by running sudo /etc/init.d/sshd restart. Now you can log in from any IP with the command ssh your-user@PublicDNS, it will prompt you for a password, and you will be entered.
Setting Up Virtual Hosts
Your public html folder is located in /var/www/html. Anything that is visible to the public should be located there. I've created a folder through SFTP called example. I'm also going to create a 000 folder, to be the localhost directory.
Edit the Apache configuration file.
nano /etc/httpd/conf/httpd.confFind AllowOverride None in <Directory "/var/www/html"> and change to AllowOverride All.
Add virtual hosts by adding this to the bottom of the file.
NameVirtualHost *:80

<VirtualHost *:80>
    ServerName localhost
    DocumentRoot /var/www/html/000
</VirtualHost>

<VirtualHost *:80>
  ServerName www.example.com
  ServerAlias example.com *.example.com
  DocumentRoot /var/www/html/example
</VirtualHost>
Save and exit. Now edit the hosts file.
nano /etc/hostsAnd add as many hosts as you want.
127.0.0.1    dev.example.com
127.0.0.1    example.com
Remember to run service httpd restart after any Apache configuration change.
This will send the Public DNS to the 000 folder, and example.com and any related subdomain to the example folder.
You can create index.php in the 000 folder, and make it something simple to ensure php is functioning, and the localhost directive is pointing to the right place.
<?php echo '<h1>AWS Linux</h1>'; ?>Easy enough.
Maybe you already have a DNS located somewhere that you can make a test with. I'm going to make dev.example.com point to AWS. I can do this by going to my host, finding the DNS settings, and creating a DNS Resource Record.
- Name: dev.example.com
- Type: CNAME
- TTL: 300
- Target: PublicDns
If you don't have a DNS or host already around that you can play around with, Route 53 on the AWS dashboard is where they take care of all DNS related entries.
Transferring Files to EC2
At this point, I have SFTP set up, so I can transfer files over the old fashioned way, with Transmit or Coda. But I'm going to do something even easier, and pull the code from a Git repo, since it's already up there.
git init
git remote add origin https://repo.git
git pull origin master
Now when I go to my site, all my files are there and the site is live.
Conclusion
You should have been able to run through this entire article without once referring to StackOverflow or Google to look up a command or explanation. If that's not the case, then I need to revise and improve the article.
Hopefully some of the aspects of setting up a server in AWS have been clarified, and you feel excited to explore more of AWS. If this article provides helpful, I'll look into making guides for setting up static hosting with AWS, databases in the cloud with RDS, setting up WordPress, setting up a CDN with CloudFront, load balancing multiple instances, and so on.


